Gingerbread Castle How-To

Inspiration:
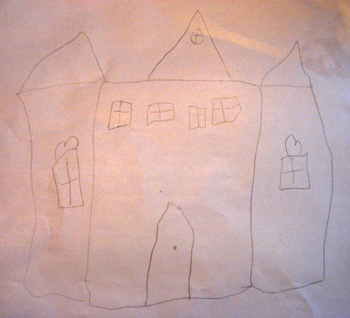
I wanted to do something a little unusual for our gingerbread house and Laurel and I decided to try to make a gingerbread castle. Her sketch served as perfect inspiration - simple yet representational.
After printing, perusing, and comparing the three gingerbread house leads I shared here, I decided to use the King Arthur Flour recipe since their templates fit best with our modified castle design.
Design:
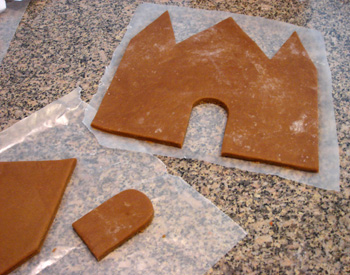
To create the castle walls I used the King Arthur Gable End template for the castle sides and the Side Wall template (modified) for the back and front (see end of PDF for templates). For the back and front sides I added 3 triangle points to the top edge of the template. I achieved this by printing and cutting out the Gable End and Side Wall templates, then center aligning them (so gable point = middle triangle point). I traced this pattern onto posterboard then drew in a slightly smaller triangle on either side of the center triangle. As in Laurel's drawing, I made the door rounded on the top (for the front piece).
I preferred to cut out the template pieces from posterboard (instead of suggested cardboard) so I could lay the template directly on the dough for cutting, without worrying about how grubby the cardboard (from our recycling bin) might be.
Note: this design has no roof. We were OK with that, but if you want a traditional roof to decorate, go with a classic house!
Dough & Icing:
I followed the from-scratch gingerbread and royal icing instructions from the King Arthur PDF. Both are easy to make, particularly if you are experienced with gingerbread or sugar cookie rolling and cutting.
I rolled the dough out on wax paper and then slid the paper right onto a baking sheet, rather than rolling out on a countertop and trying to transfer. You could also try rolling out on a Silpat mat; just be sure to cut the pattern with a butter (not super sharp) knife so you don’t ruin your Silpat.
With my modified templates, the King Arthur recipe was just enough for the four walls, plus a handful of gingerbread people. When you’re working with each ½ batch of dough, roll out the front/back (i.e., bigger) piece first, as it will be easier to stretch/roll out dough for the smaller side pieces second.
Laurel and I made the dough the night before assembly and decoration (I wanted to break up the process so I didn’t feel bound to the kitchen all day). I rolled and cut out the template pieces, then gave Laurel the scraps to roll and cut into gingerbread people while I made the icing.
Assembly:
I have a 12 x 18 inch cake pan (for my giant sheet cakes) and Jon had the excellent idea of flipping it over to create a stage for the castle. The royal icing is amazing stuff. It hardens very quickly (though you can scrape it off easily if need be) and since we didn’t install a roof, we were able to start decorating within about 20 or so minutes of assembling the four sides.
Decorating:
This is really where the fun comes in and Laurel and I had an amazing time. We didn’t have a decorating plan in advance and just bought what caught our eye at the market: starlight mints (I highly recommend these; the swirls are so pretty and festive), jellybeans, gumdrops, and gummy bears. I also bought pointy ice cream cones (originally thought they would be part of castle) and also decided to buy the rainbow flat bottom cake cones sitting next to the pointy cones because I thought they might look fun around the castle.
All of the candy worked great, although I did cut the gumdrops in half to sit flush against the house walls because the ones we got were huge. I was skeptical as to whether the frosting could hold the jellybeans (up the corners and along the top edges of the walls) but it was not a problem at all.
Our real moment of brilliance was adding the cake cones around the edge, then placing a starlight mint and “gummy bear guard” on top of each “lookout post” (use frosting to secure all pieces). We finished by squirting the remaining icing in all the blank spots on the stage (i.e., covering up the silver pan spots) and sprinkling with coconut flakes to make it look like snow. I also added flags to add to the castle effect, using a toothpick and folded over triangle (double stick taped inside) with each of our letters on it.
I can’t recommend this project enough! In general, I really love how baking projects lend to sensory exploration (and you can chat math and measurement with older kids), but this one was so fun, it may need to become more than a once a year project.


